Hey there folks. Here is a little tutorial for you to follow. It has a zillion pictures, so maybe I won't have to type as much, since a picture is worth a thousand words, right? This is one of the most simple bags I have made. It is unlined. The ripstop used in uniforms is a very durable and strong fabric, so a lining is really just for looks and to make the bag more heavy. Well, we don't need a heavy bag do we? Who needs that? It is summer, right? Let's lighten the load.
Let me give you a really brief overview...you will need one leg from a pair of pants with a cargo pocket. I used a set of ACUs because I have a ton of them folded up nicely out in the garage. Any pair of pants will work, I bet.
Gather your supplies. You will need:
- a leg from a pair of military pants (with a cargo pocket) I would have prefered a simple BDU or DCU pair but I didn't want to go back out into my garage. So I had to deal with that silly lower leg pocket (my husband keeps his gross Copenhagen in it...he thinks I don't know, but I do and now all of you do too.)
- you will need about 44 inches of binding for the top of the bag. I just used some binding that was left over from the last quilt I made. If you have no idea what I am talking about....You will need a 2.5 inch strip of fabric selvedge to selvedge pressed in half. This will be your binding.
- you will need about a quarter yard of a more heavy weight fabric. I used a blue canvas that the boys picked out for their teachers.
- you will need your sewing machine and some cotton thread

Cut up the crotch seam of the pant leg. All the way up. From ankle to groin. Then when you get the the groin go on up with your scissors along side of the button fly part. Go across to the pocket being careful to leave a good deal of fabric above the cargo pocket. This will be the top of your bag, so try to leave alot of space. You can always trim it off later.
This is not the best picture, but can you see how much fabric is left above the top of the cargo pocket?
Now fold the leg piece in half and trim off the uneven sides. This is the step that will determin how wide your bag is. I really wanted this bag to be as big as possible, but yet again I was working with a little pair of pants so there was not all that much fabric to begin with.
Now you will make your first seam. We are working with French Seams here, so you will first sew ugly sides together with the pretty side up. Use a narrow 1/4 inch seam. I know that in the beginning this will feel wrong, but don't worry about it, just do it.
After you have sewn up both sides flip the bag inside out and sew up the sides again with a more wide seam. Ideally you will catch all of the 1/4 inch seam you just made and none of the raw edges will peek through. This seam is nice and finished looking.
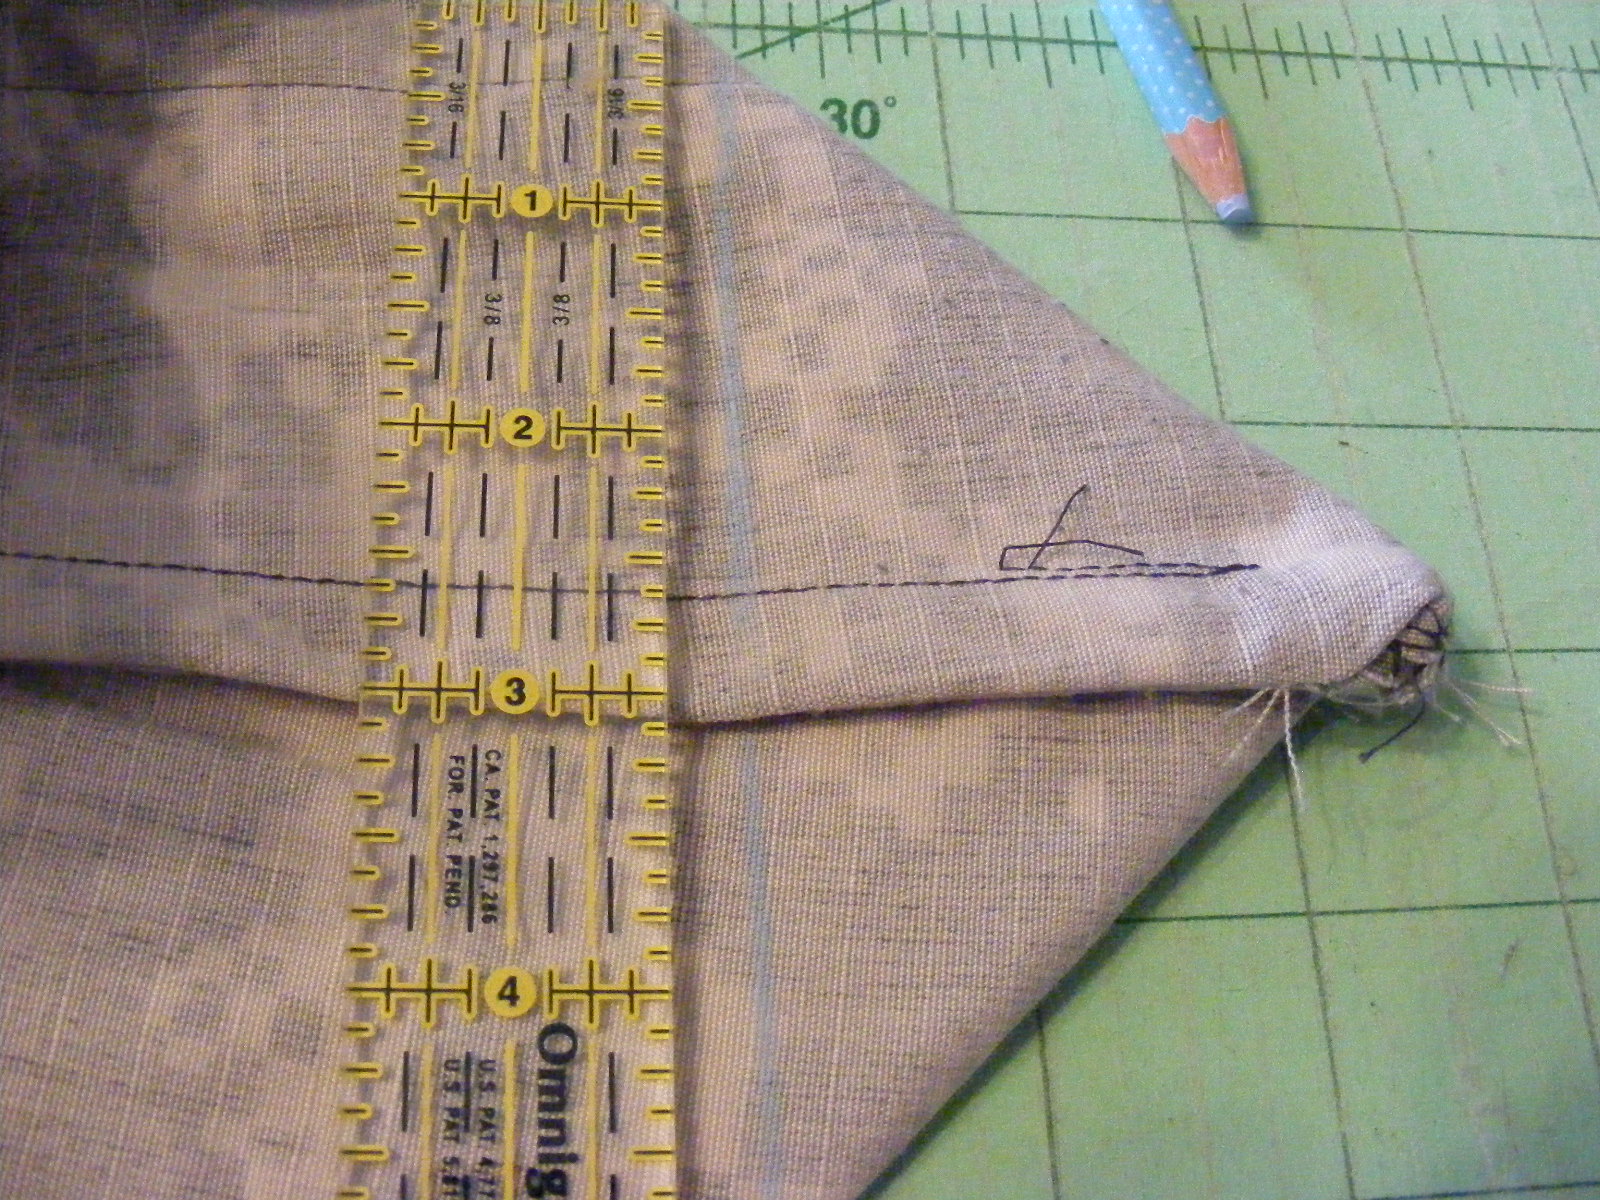
Next step is to block off the bottom of the bag.I made my corners 5 inches wide. so the base of the bag is 5 inches after you sew this seam.
You can cut these little triangles off if you want to, but they don't bug me with this bag, so I left them on.
So now we will make the little inside pocket thingy. Ideally I would line this bag and in the lining I would put some big deep pockets. But frankly I don't want to line it, it has a nice deep pocket on the front (since I used the ACU, it also has a pocket on the back.) and this little hanging pocket thing is a great spot to keep your lip gloss, cell phone and a pen.
So, cut a 6" x 26" piece of fabric. I used the blue canvas. Because I used the canvas I will not need to line my pocket to make it more strong. If you are using a large or long set of pants you can use some of the fabric that you cut away when making the initial rectangular bag shape. My pants were too small.
Fold your piece of fabric in half and stitch up the sides with a 1/4 inch seam. Press is and then turn it inside out.
Press it again.
Fold the finished end of the long rectangle up about 4.5 or 5 inches. Pin this bit in place.
Stitch down each side back stitching a couple times when your sewing machine passes over the pocket part.
If you would like to have a little slot for your pen, just make another line of stitching about an inch over.
So, now we make the straps. I hate making straps. I really do. I don't know why, but I just hate them. So here is a really easy strap.....
- cut a 4" by 24" piece of canvas (once again I used the blue)
- take it over to your Iron. Press the strip in half then open it back up
- Now, press both side in almost to the center crease.
- Fold over yet again and press it down. I don't pin, but please feel free if you are a pinner.
- Stitch along both sides of the strap.
- It is almost impossible for me to leave a strap as boreing as the one above, so I changed to my free motion foot and made my straps fancy. I think you should too. It is fun. Loops on one, twirls on the other.
So, lets finish this little beastie up. Turn your bag inside out. Center the pocket thing on the inside of the back. Pin it in place.
Take your binding piece of fabric, and pin it with the raw edges right along the top of the bag. Start sewing about 4 inches down on the binding (you will need a couple free inches of binding so you can connect the ends of the binding.)
Just sew along with a 1/4 inch seam....
Now...do you see how there is about a 1/4 inch overlap of my binding ends? And about 8 inches of binding that is not sewn down? Well, this is the step that you will sew the the ends together. OPEN up both ends, and stitch them together with a 1/4 inch seam. Fold the binding piece back in half and finish sewing it down.
It should look like this.
So, Turn your bag inside out. Now you are going to pin the straps in place. I have mine pinned about 4 inches from the side seams. Fold over the binding. It should be the folded edge. If it isn't you really will need to take the binding off and redo it. Sorry. If you did it correctly, just stitch the folded side of the binding down all around the top of the bag. You are almost finished!!!!!
Last couple steps...the end is in sight! See how the strap points down? That is dumb, huh? Well, just fold it up.
See, just fold it up on top of itself. and sew a strong box. What the heck is a strong box?
It is a square with an X in the middle. See? A strong box. Now your straps should be nice and powerful and your bag of books or buttermilk, or whatever you are carrying around won't fall apart.
Off to the library with you!
I WANT to see the bags you make if you make any. PLEASE????? Oh, the fine print...please use this tutorial for your own personal sewing. You can make the bags and give them away, that is fine but please don't make bags of my design and sell them. It makes me quite sad when I see that.


9 comments:
Great idea Tia! I may need to grab a pair of old cargos at the thrift shop and try it. I like your techniques for the binding and straps too.
Totally, totally, totally cool! I'm going to make one. Maybe today, if the boys let me sew. I'll definitely let you know how it goes.
THANK YOU so much for the tute!!! Love it!
KZK
I am 85% done! Just need to add straps. I'm adding them last instead of having them tucked into the binding. Don't ask how many rules I broke ... but it looks cool so far! :) I'll post pix over on my own blog in a couple days! VERY cool tote and great tute!!!
KZK
I'm about 85% done. Just need to add the straps. I"m using polypro and adding them last instead of tucking them into the binding. Or that's the plan as of right now. Don't ask how many rules I broke ... but it sure looks cool! :)
Your tute was very easy to follow! I'll post pix on my own blog in a day or two and will send you the link. Thanks again for doing this!
KZK
I am so happy you are giving it a go! It really is a very simple bag...just about as simple as is possible to make and still be strong and durable. I have a trick for more pockets on the back, but since I was making a ACU bag it did not let me use them. You really are led by the uniform that you are using....but you know that! Oh and there are no rules! Or rules are meant to be broken, right? I can't wait to see your bag.
that was a great tutorial. i love the simple method of connecting up the binding seam. that is the hardest part for me. I never thought of measuring it that way and using a 1/4 inch. then it fits perfectly. genius!
Hey there Jennifer!
I am sure there are better ways, or more "right" ways to finish the binding, but this method works the best for me.
Sorry for the double comment! I was using my iPad and I didn't think the first one had "taken".
I used an old BDU pant leg, so I could have done something on the back... but didn't. Next time! :)
KZK
I put a post up today with my VERY cool tote on it! :)
What a really fun project! Thanks again=
KZK
Post a Comment